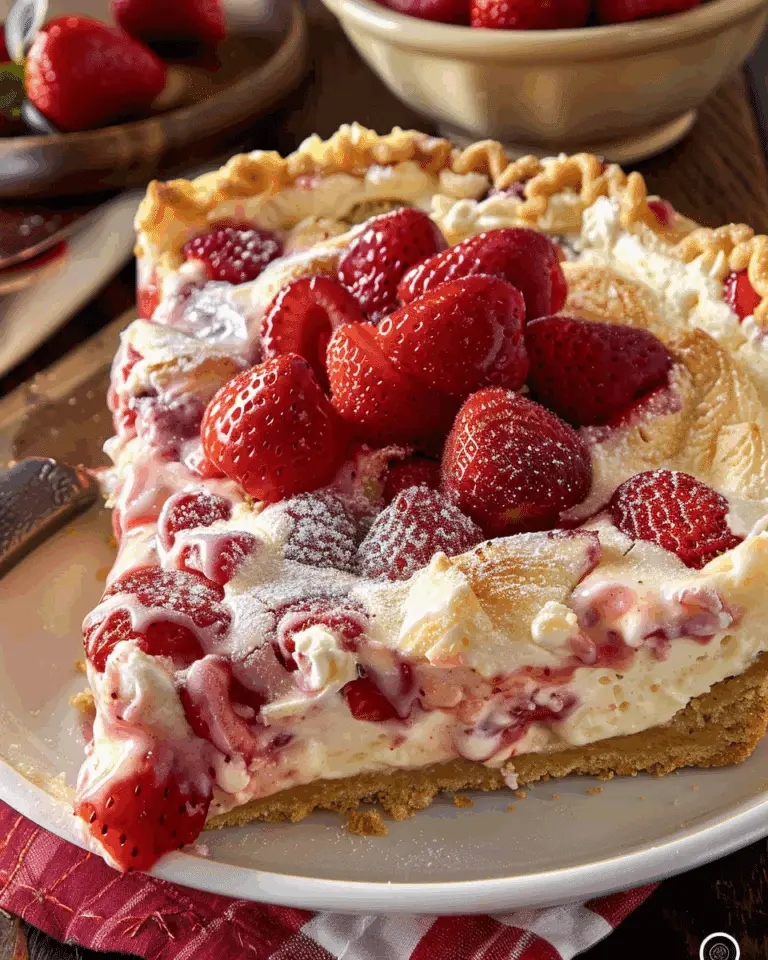
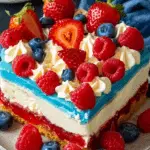
This No-Bake Patriotic Cheesecake is a festive, creamy, and colorful dessert that’s perfect for summer celebrations. With a classic graham cracker crust, smooth vanilla cheesecake filling, and vibrant red and blue layers, it’s a fun and easy way to show off a little holiday spirit—without turning on the oven. I love bringing this out for the Fourth of July, Memorial Day, or any summer gathering where I want to impress with something sweet and patriotic.
Why You’ll Love This Recipe
I love how simple yet stunning this cheesecake is. It has all the creamy richness I expect from cheesecake, but with a light, airy texture thanks to the no-bake method. The best part? I don’t need to worry about water baths, cracking, or baking time. It’s a make-ahead dessert that’s as fun to make as it is to eat, and it always brings a smile with its bold layers and fresh berry topping.
Ingredients
(Here’s a tip: Check out the full list of ingredients and measurements in the recipe card below.)
-
Graham cracker crumbs
-
Unsalted butter (melted)
-
Cream cheese (softened)
-
Granulated sugar
-
Vanilla extract
-
Whipped topping or heavy cream (whipped)
-
Red food coloring
-
Blue food coloring
-
Fresh strawberries and blueberries (for topping)
Directions
-
I start by mixing the graham cracker crumbs and melted butter together, then press the mixture firmly into the bottom of a springform pan to form the crust. I chill it while preparing the filling.
-
In a large bowl, I beat the cream cheese, sugar, and vanilla extract until smooth and creamy.
-
I fold in the whipped topping or whipped cream until the mixture is light and fluffy.
-
I divide the cheesecake filling evenly into three bowls—leaving one plain, tinting one red, and the other blue using food coloring.
-
I carefully layer the blue mixture on top of the crust and smooth it out, then place the pan in the freezer for 10–15 minutes to set.
-
I repeat the process with the white layer, followed by the red layer, chilling each layer before adding the next to keep the colors clean and distinct.
-
Once all layers are assembled, I chill the entire cheesecake in the refrigerator for at least 4 hours, or overnight for best results.
-
Before serving, I top it with fresh strawberries and blueberries for a festive finish.
Servings and timing
This cheesecake serves about 10 to 12 slices. Prep time takes around 25 minutes, plus a total chill time of at least 4 hours. I usually make it the night before an event so it’s fully set and ready to go when I need it.
Variations
When I want to change things up, I sometimes swap out the graham cracker crust for a vanilla wafer or Oreo crust. I’ve also added a layer of berry jam between the crust and the filling for an extra fruity boost. For a dairy-free version, I’ve had success using dairy-free cream cheese and coconut whipped topping. And if I want to skip the food coloring, I just keep it classic and top with red and blue berries for a naturally patriotic look.
Storage/reheating
I store the cheesecake covered in the fridge for up to 4 days. It holds up really well, and the layers stay vibrant. For longer storage, I freeze it (without the fresh fruit topping), wrapped tightly in plastic wrap and foil. When I’m ready to serve, I thaw it in the fridge overnight and add the berries just before serving. Since it’s a no-bake cheesecake, there’s no reheating involved—just slice and enjoy chilled.
FAQs
Can I use gel food coloring instead of liquid?
Yes, I use gel coloring when I want more vibrant layers without thinning out the mixture. A little goes a long way.
Can I make this in a regular pie dish?
I’ve done it in a deep dish pie plate, and it works fine. I just layer carefully and expect slightly thinner layers.
How do I keep the layers from blending together?
I freeze each layer for 10–15 minutes before adding the next. This helps them firm up and stay separate.
Can I use fresh whipped cream instead of whipped topping?
Absolutely. I whip heavy cream to stiff peaks and fold it into the filling—it adds a lovely homemade touch.
Will the colors fade in the fridge?
Not if I use gel food coloring. I’ve kept leftovers for days and the colors stayed bright and beautiful.
Conclusion
No-Bake Patriotic Cheesecake is a cheerful, crowd-pleasing dessert that’s as easy to make as it is stunning to serve. I love how festive it looks with its red, white, and blue layers, and how creamy and light it tastes. It’s my go-to dessert for summer holidays, and it never fails to bring a pop of color and flavor to the table.
No-Bake Patriotic Cheesecake
- Author: liinaa
- Prep Time: 25 minutes
- Cook Time: 0 minutes
- Total Time: 4 hours 25 minutes
- Yield: 10–12 slices
- Category: Dessert
- Method: No-Bake
- Cuisine: American
- Diet: Vegetarian
Description
No-Bake Patriotic Cheesecake is a festive, creamy, and colorful dessert with red, white, and blue layers, perfect for summer holidays. It’s easy to make, requires no baking, and is topped with fresh berries for a vibrant, crowd-pleasing finish.
Ingredients
- 2 cups graham cracker crumbs
- 1/2 cup unsalted butter, melted
- 16 oz cream cheese, softened
- 3/4 cup granulated sugar
- 1 teaspoon vanilla extract
- 2 cups whipped topping or whipped heavy cream
- Red food coloring
- Blue food coloring
- Fresh strawberries (for topping)
- Fresh blueberries (for topping)
Instructions
- Combine graham cracker crumbs and melted butter. Press into the bottom of a springform pan to form the crust. Chill in the fridge.
- Beat cream cheese, sugar, and vanilla extract until smooth and creamy.
- Fold in whipped topping or whipped cream until light and fluffy.
- Divide mixture into three equal parts. Leave one plain, color one red, and one blue using food coloring.
- Spread the blue layer over the crust and freeze for 10–15 minutes.
- Add the white layer, smooth, and freeze for another 10–15 minutes.
- Repeat with the red layer and then refrigerate the entire cheesecake for at least 4 hours or overnight.
- Top with fresh strawberries and blueberries before serving.
Notes
- Use a vanilla wafer or Oreo crust for variation.
- Add a berry jam layer over the crust for extra fruitiness.
- Use dairy-free alternatives for a vegan-friendly version.
- Gel food coloring works best for vibrant layers without thinning the mix.
- Freeze each layer before adding the next to keep colors clean.
Nutrition
- Serving Size: 1 slice
- Calories: 320
- Sugar: 22g
- Sodium: 210mg
- Fat: 22g
- Saturated Fat: 13g
- Unsaturated Fat: 8g
- Trans Fat: 0g
- Carbohydrates: 28g
- Fiber: 1g
- Protein: 4g
- Cholesterol: 55mg

